How To Record A Guitar At Home?
Coincidentally, you've found yourself with the desire to record your guitar at home. Fear not, for this article will guide you through the process step by step.
From setting up your recording space to choosing the right equipment, we'll ensure you have all the tools necessary for a successful recording session.
With helpful tips and tricks along the way, as well as guidance on editing and mixing your final product, you'll soon be on your way to capturing your guitar's sweet melodies in the comfort of your own home.
Key Takeaways
- • Incorporate various effects for depth and dimension.
- • Use reverb to create a sense of space.
- • Use distortion for a grittier tone.
- • Shape overall frequency response with EQ.
Set Up Your Recording Space
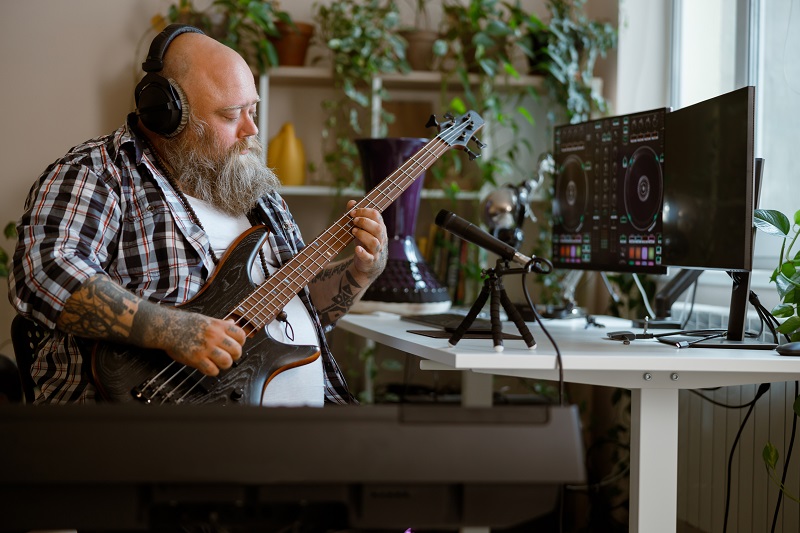
You'll need to set up your recording space before you can start recording your guitar at home. Whether you're using an acoustic or electric guitar, it's important to create an environment that allows for optimal sound quality.
Begin by selecting a room with minimal background noise and good acoustics. If you're using an electric guitar, make sure to connect it to an audio interface or amplifier for proper sound amplification.
After selecting your interface, connect it to your computer using USB and set it up using the provided software that comes with the device.
To improve the overall sound quality and reduce unwanted noise, consider implementing some DIY soundproofing techniques such as hanging heavy blankets on the walls or investing in acoustic panels. Additionally, placing a rug on the floor can help minimize reflections and dampen any vibrations.
Remember, a well-prepared recording space is crucial for capturing professional-sounding guitar recordings at home.
Choose the Right Equipment
To get started, it's important to select the appropriate gear for your setup. When it comes to recording a guitar at home, choosing the right guitar cables and selecting the best guitar pickups are crucial factors that contribute to achieving high-quality sound.
Firstly, when choosing guitar cables, opt for ones that have good shielding to minimize any interference or noise. Look for cables with durable connectors that won't easily break or become loose during recording sessions. Additionally, consider investing in high-quality instrument cables that are specifically designed for guitars, as they can enhance the overall tone and clarity of your recordings.
Secondly, selecting the best guitar pickups is essential for capturing the unique character and tone of your instrument. Different types of pickups produce distinct sounds, so experiment with single-coil or humbucker pickups to find what works best for your style of playing and desired sound.
Tips and Tricks for Recording
When it comes to recording, proper mic placement and positioning are crucial for capturing the best sound. Experimenting with different recording techniques can yield unique and interesting results, allowing you to find the perfect tone for your guitar.
Additionally, using effects and plugins in your digital audio workstation (DAW) can enhance your recordings by adding depth, texture, and polish to your guitar tracks.
Proper mic placement and positioning
For optimal results, it's important to consider proper mic placement and positioning when recording a guitar at home. Common mistakes to avoid when positioning your mic for recording include placing the microphone too close to the sound hole, which can result in an unbalanced and boomy tone. Additionally, avoid positioning the mic too far away from the guitar, as this can cause a loss of clarity and detail in the sound. Instead, aim to position the mic around 6-12 inches away from the guitar's sweet spot, usually around where the neck meets the body.
To explore unconventional mic placement techniques for unique guitar tones, try experimenting with different positions such as pointing towards specific parts of the guitar like the bridge or fretboard. You can also try using multiple microphones placed at different angles and distances to capture a wider range of frequencies and create a more immersive sound. Don't be afraid to think outside of traditional methods and get creative with your mic placement choices!
Remember that finding the right mic placement will depend on various factors such as your desired tone, room acoustics, and type of microphone being used. Take some time to experiment and listen back to recordings to find what works best for your specific setup and preferences.
Experimenting with different recording techniques
Get creative with your mic placement choices to experiment with different recording techniques and achieve unique guitar tones.
Recording in different locations can greatly impact the sound you capture. Try positioning your microphone close to the sound hole for a warm, boomy tone, or near the bridge for a brighter, more articulate sound.
Another option is to move the microphone further away from the guitar to capture more room ambience and natural reverb. Experimenting with microphone placement and distance is key to finding your desired sound.
Don't be afraid to try unconventional approaches like placing the microphone above or below the guitar, or even experimenting with stereo miking techniques using multiple microphones.
By exploring these various options, you'll discover new ways to enhance your recordings and create a signature guitar tone.
Using effects and plugins in your DAW
Using effects and plugins in your DAW can add depth and texture to your recorded guitar tracks. One way to enhance your sound is by using virtual amp simulations. These software plugins emulate the sound of different guitar amplifiers, allowing you to achieve a wide range of tones without the need for physical amps. Experiment with different amp models to find the one that best suits your style and desired sound.
Another useful tool is guitar pedal emulations. These plugins recreate the effects produced by various pedals, such as distortion, delay, reverb, and modulation. By applying these effects in your DAW, you can create unique sounds and experiment with different sonic textures.
When using effects and plugins, it's important to keep in mind that less can sometimes be more. Avoid overusing effects and make sure they enhance rather than overpower your guitar tracks. Use them tastefully to complement your playing and bring out the best in your recordings.
Editing and Mixing Your Recording
When editing and mixing your recording, there are three key points to focus on: cleaning up your audio, balancing and EQing your tracks, and adding effects and final touches.
To clean up your audio, you can remove any unwanted noise or background sounds using tools like noise reduction plugins or spectral editing.
Balancing and EQing your tracks involves adjusting the volume levels of each instrument to create a cohesive mix, as well as using equalization to enhance certain frequencies or remove unwanted ones.
Lastly, adding effects such as reverb or delay can add depth and dimension to your recording, while final touches like compression or mastering can help polish the overall sound.
Cleaning up your audio
To improve your audio quality, start by tidying up the background noise in your recording. Noise reduction techniques can help eliminate unwanted sounds and create a cleaner, more professional sound.
One effective technique is using a noise gate, which cuts off any sound below a certain threshold. This can be especially useful when there are breaks between notes or during pauses in the music.
Another option is spectral editing, where you visually identify and remove specific frequencies that contribute to the background noise.
There are several audio editing software recommendations available that offer these features, such as Adobe Audition, Ableton Live, and Pro Tools. These programs provide tools for noise reduction and allow you to fine-tune your recordings for optimal clarity and quality.
Balancing and EQing your tracks
Start by ensuring that your tracks are balanced and EQed properly to achieve a professional sound. Improving guitar tone is crucial in creating a polished recording. Start by experimenting with different microphone placements to find the sweet spot that captures the true essence of your guitar's sound. Additionally, consider using a high-quality preamp or direct box to enhance the tonal characteristics and add warmth to your recordings.
Dealing with recording room acoustics is another important aspect of balancing and EQing your tracks. Room reflections can greatly affect the clarity and overall quality of your recordings. To minimize unwanted reflections, try using acoustic treatment such as bass traps, diffusers, and absorbers in your recording space.
Furthermore, utilizing EQ can help you shape the frequency response of your guitar tracks. Identify any problem frequencies or areas where certain frequencies are overpowering others, then apply cuts or boosts accordingly to achieve a more balanced and pleasing sound.
By focusing on improving guitar tone and addressing recording room acoustics, you can achieve a well-balanced mix with enhanced clarity for an impressive home-recorded guitar track.
Adding effects and final touches
To add depth and dimension to your final mix, consider incorporating various effects and applying subtle touches. Here are three essential techniques you can use to enhance your guitar recordings:
Adding reverb: Reverb is a vital tool for creating a sense of space in your recordings. It simulates the natural reflections that occur in different environments, adding ambience and making your guitar sound more immersive. Experiment with different types of reverbs, such as plate or hall, and adjust the parameters to find the perfect balance.
Using distortion: Distortion can add grit and intensity to your guitar tone, giving it an edgier character. Whether you prefer mild overdrive or heavy distortion, this effect can help you achieve anything from classic rock crunch to modern metal tones. Adjust the gain level to find the right amount of saturation without sacrificing clarity.
Final touches: Once you've added effects like reverb and distortion, don't forget about other finishing touches. Consider using EQ to shape the overall frequency response of your guitar track, ensuring it sits well in the mix. Additionally, try using compression to control dynamics and add sustain if needed.
By incorporating these effects and final touches into your guitar recordings, you'll be able to create a more polished and professional sound that stands out from the crowd.
Conclusion
To conclude, recording a guitar at home can be a rewarding experience with the right set up and equipment.
By creating a dedicated recording space and selecting the appropriate gear, you can capture high-quality guitar tracks.
Remember to utilize tips and tricks such as mic placement and using effects to enhance your recordings.
Once recorded, editing and mixing your tracks will ensure a polished final product.
So grab your guitar, set up your space, and let your creativity flow as you embark on your home recording journey!